

PHOTO TEMPLATES
This photographic template process makes measuring for a custom frame bag easy!
Two simple photos - taken using the instructions below - allow me to build your custom frame bag with the beautiful fit FMG is known for.
After placing your custom frame bag order, simply follow the instructions below.

STEP 1 of 3: PREP YOUR BIKE
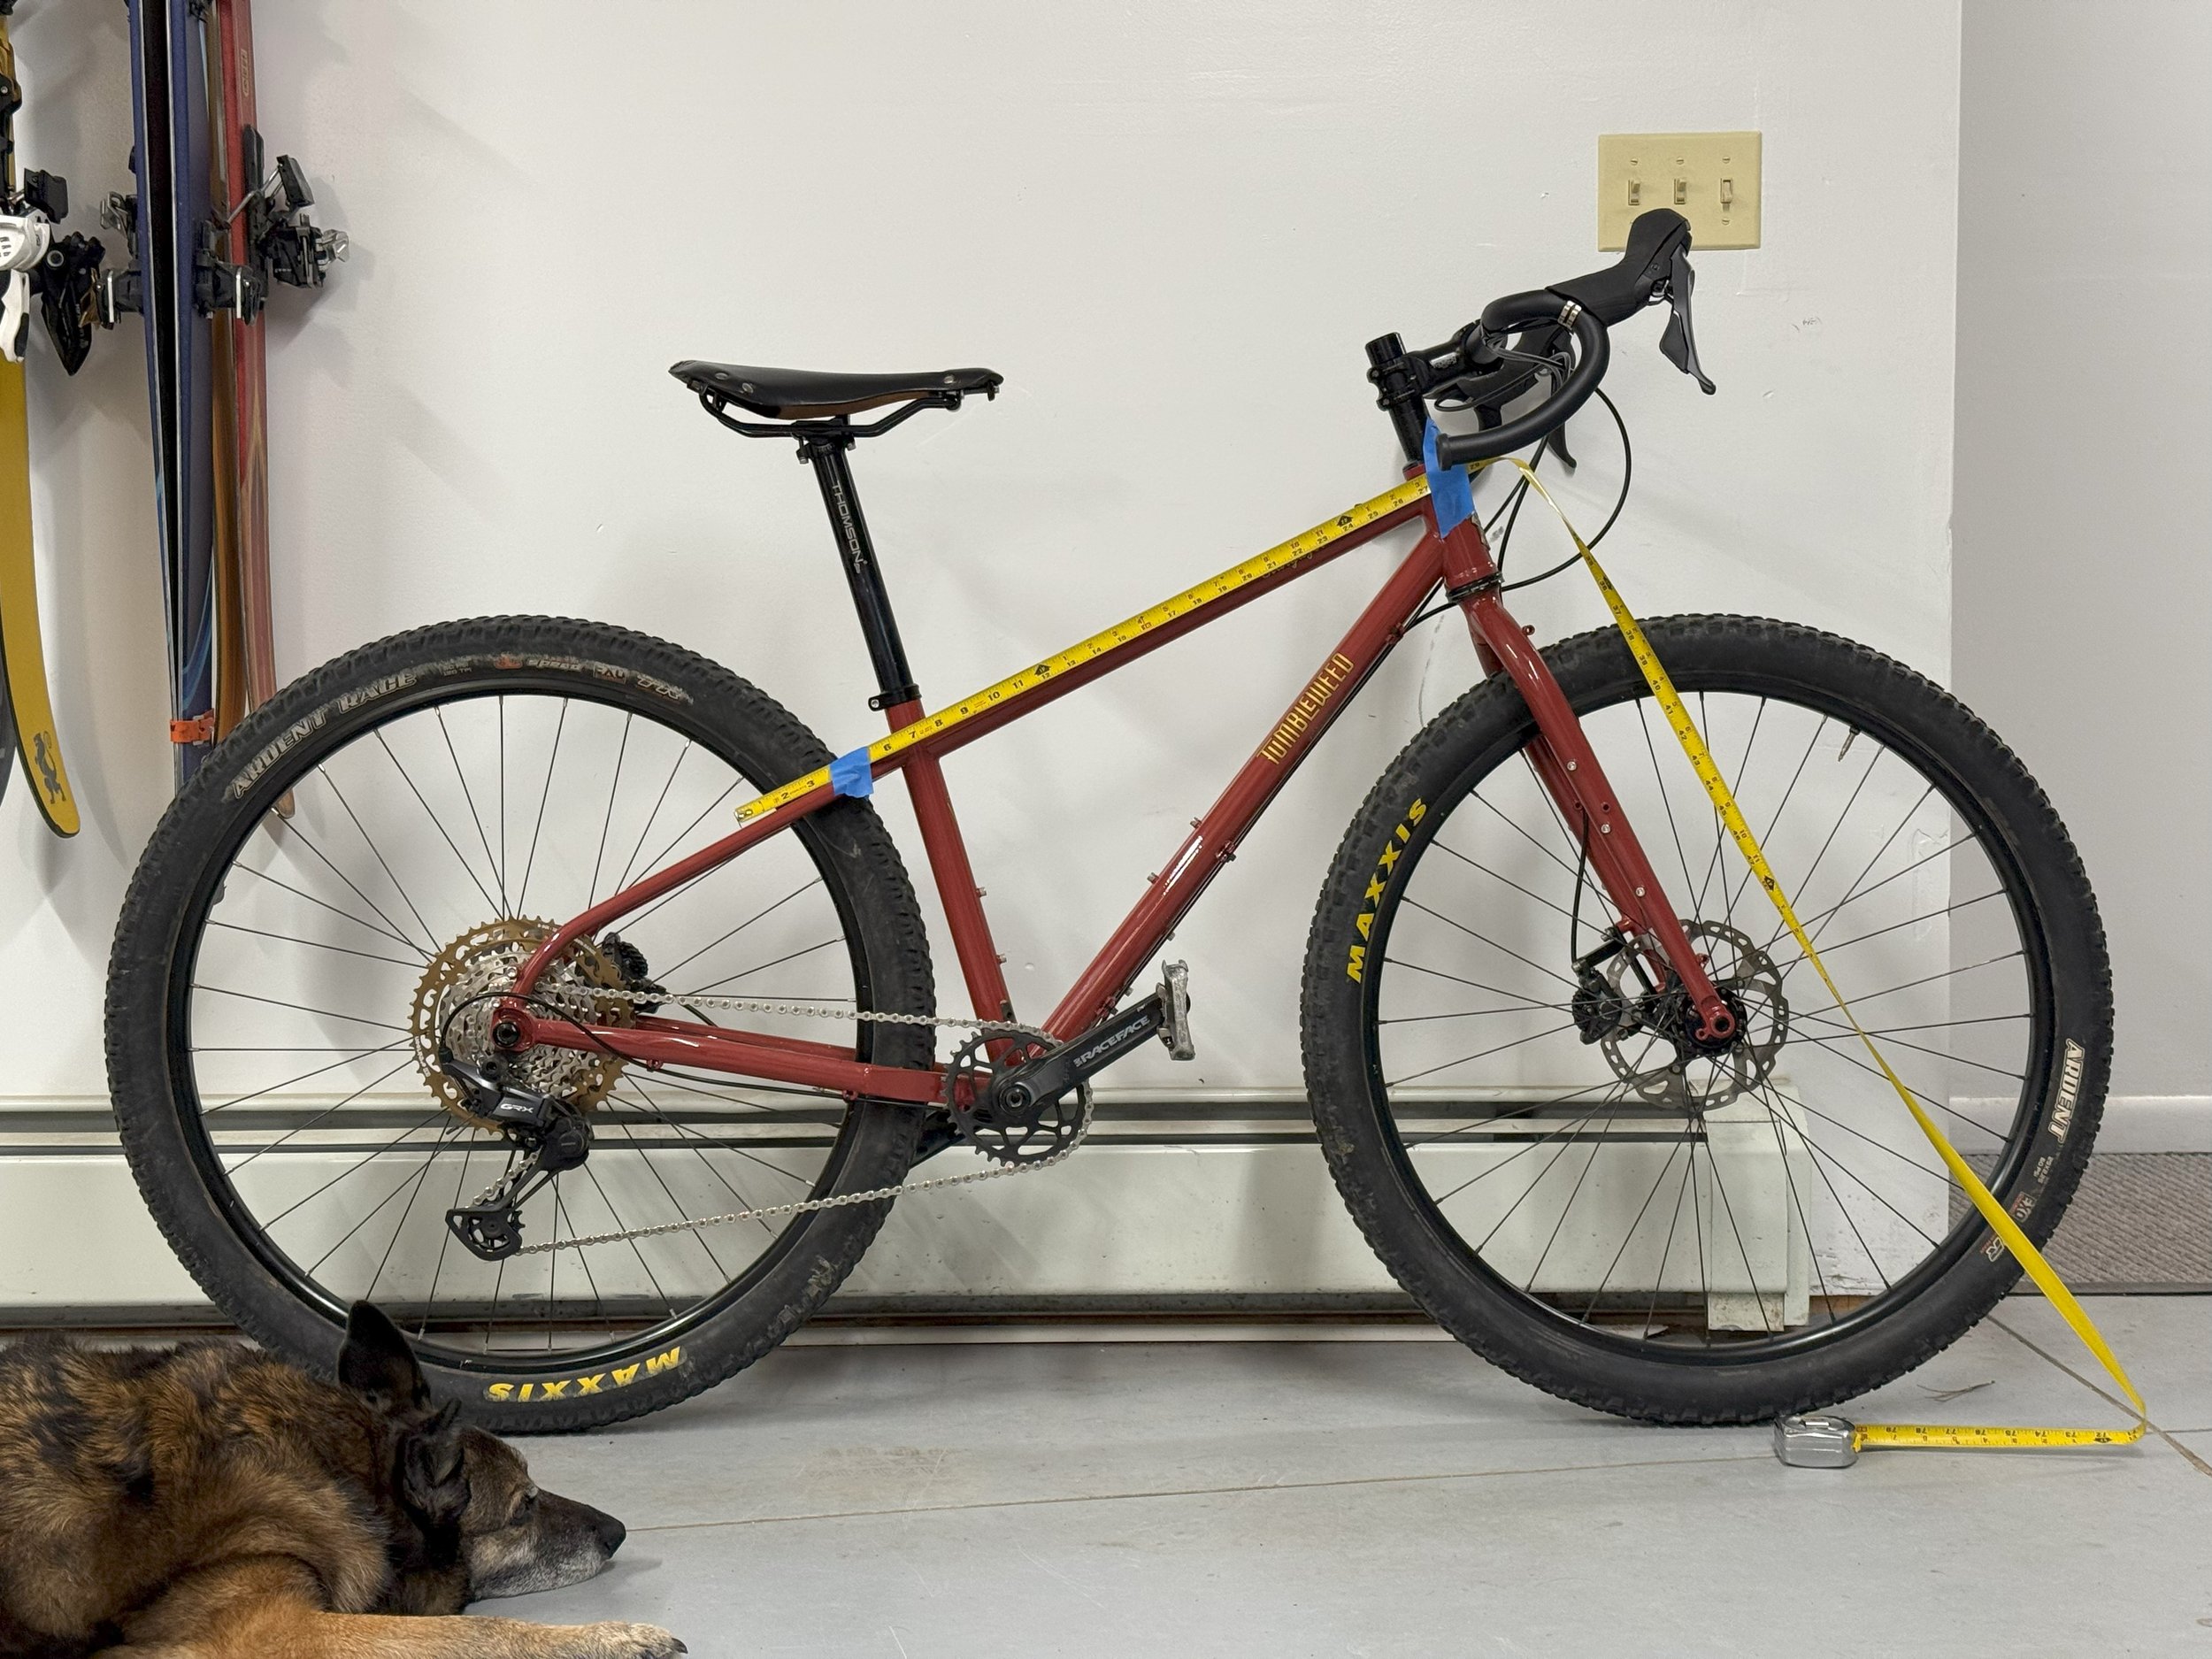
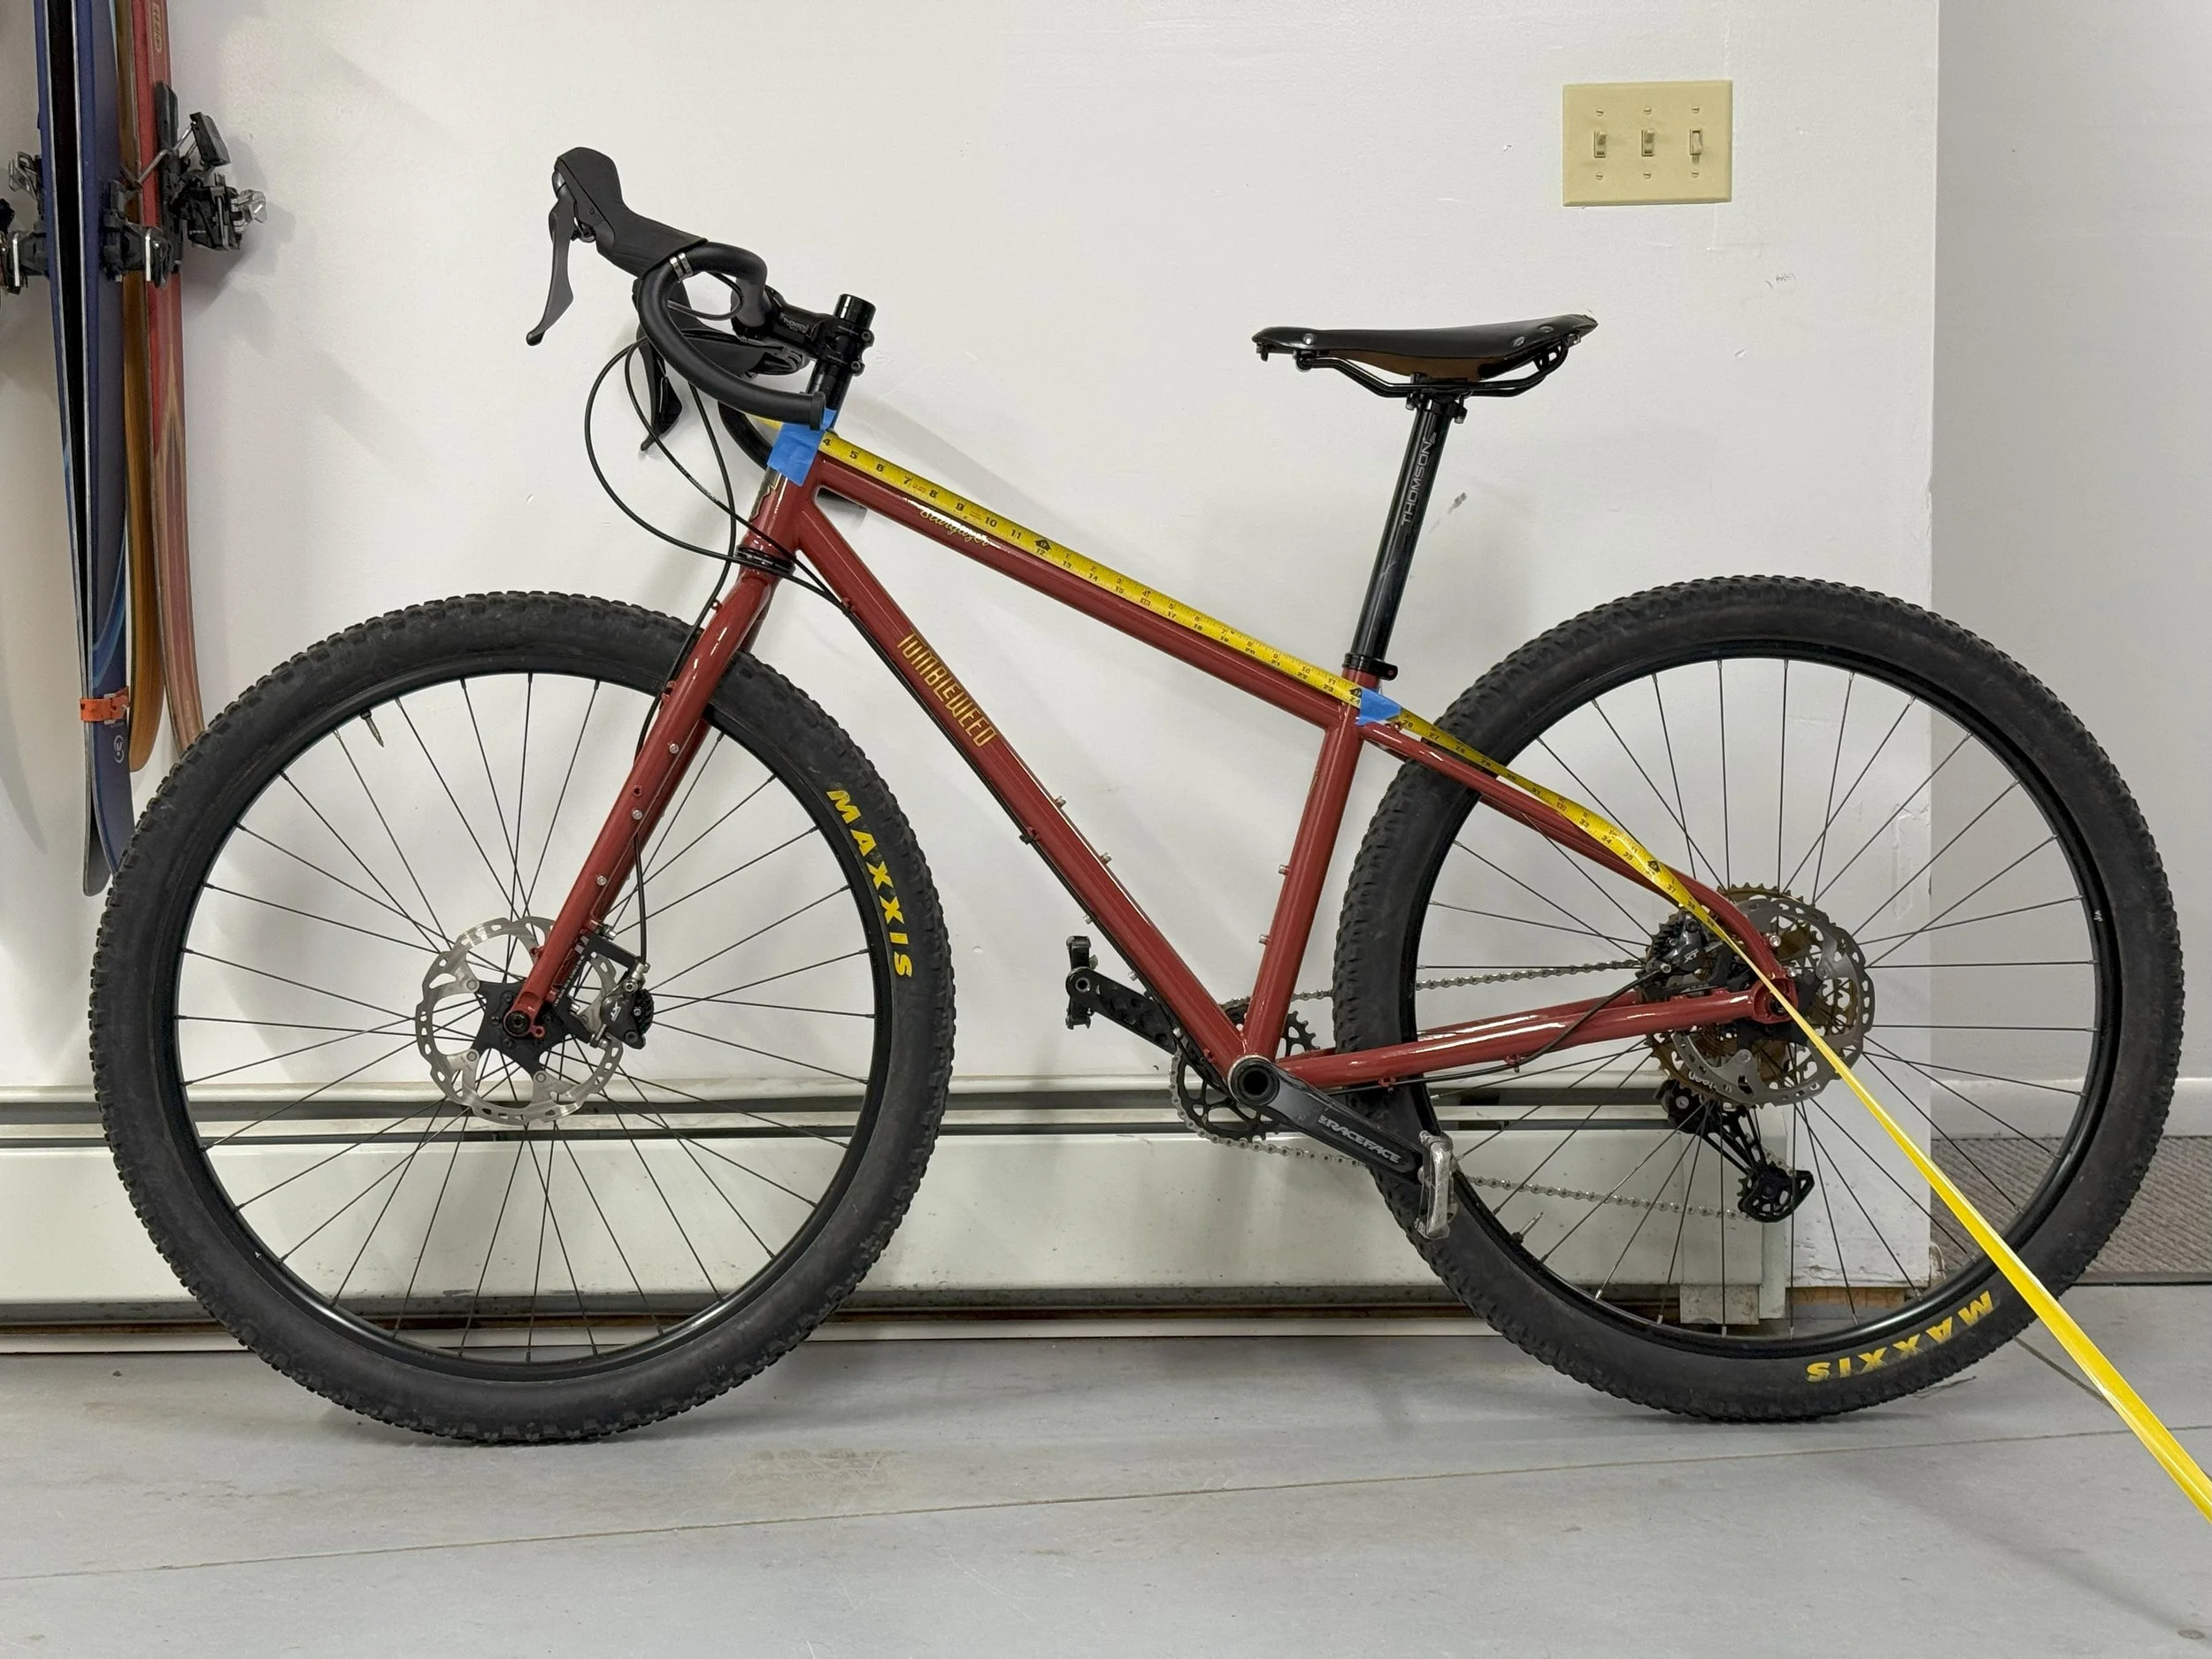
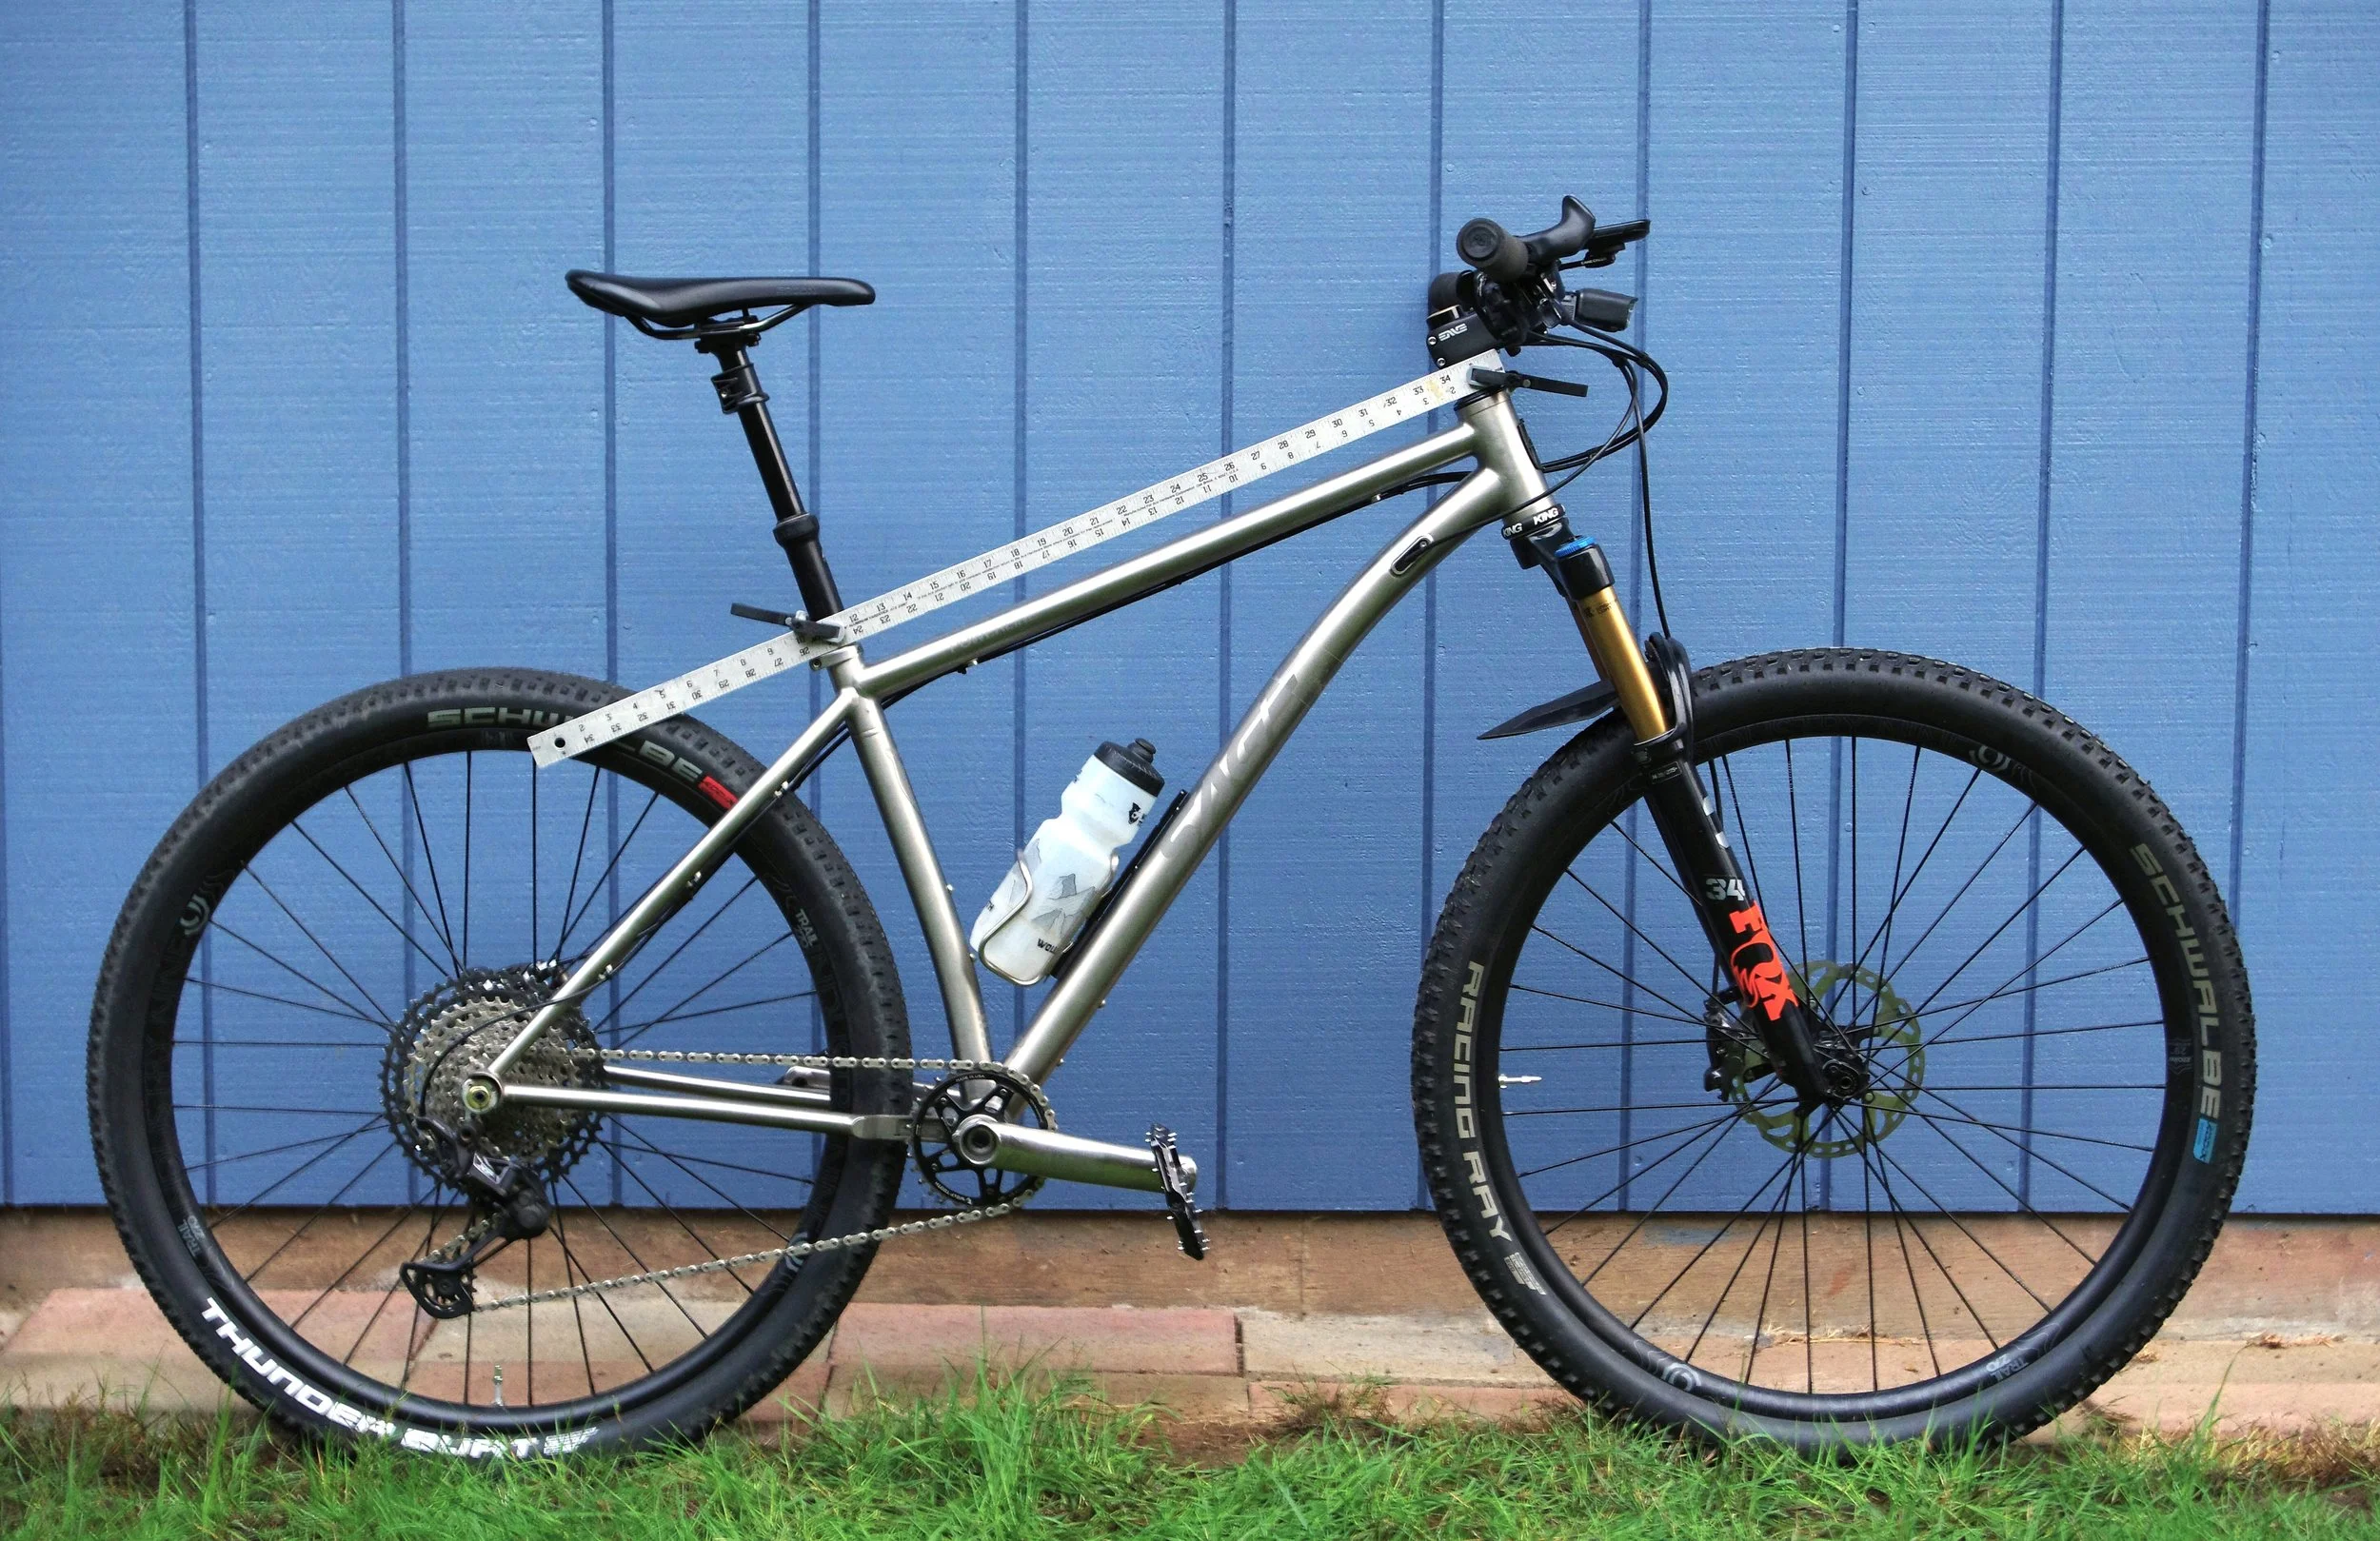
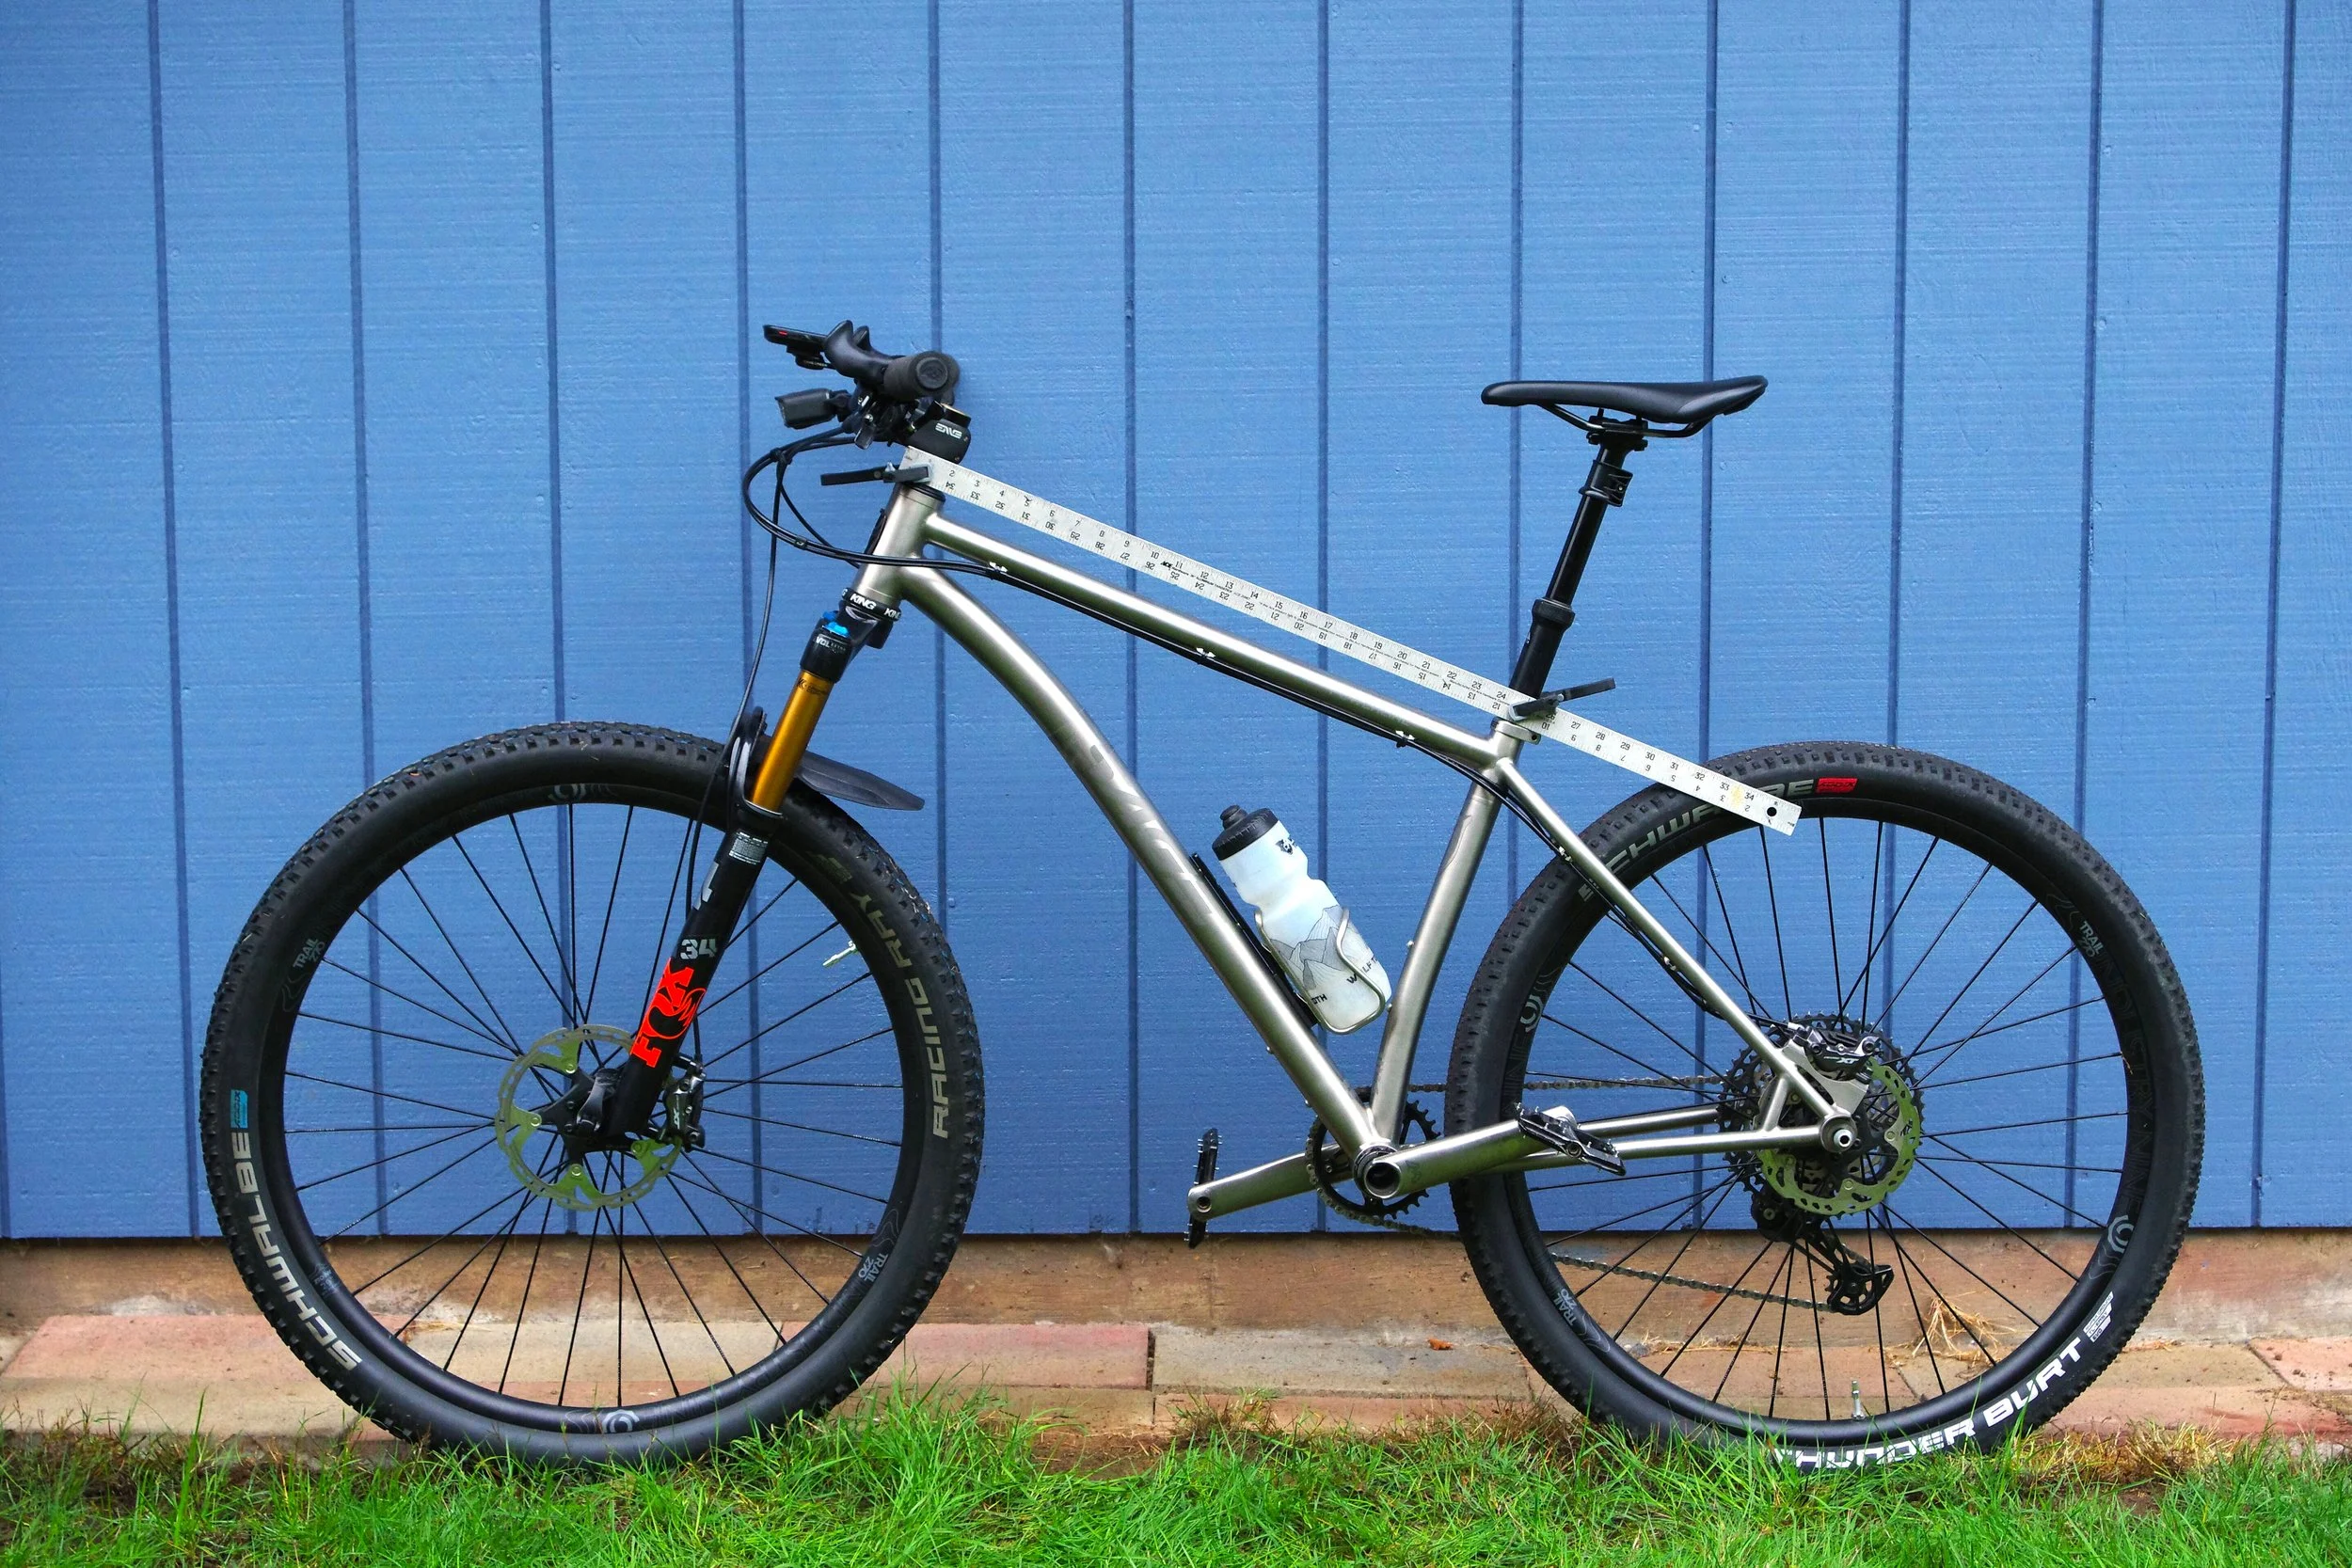
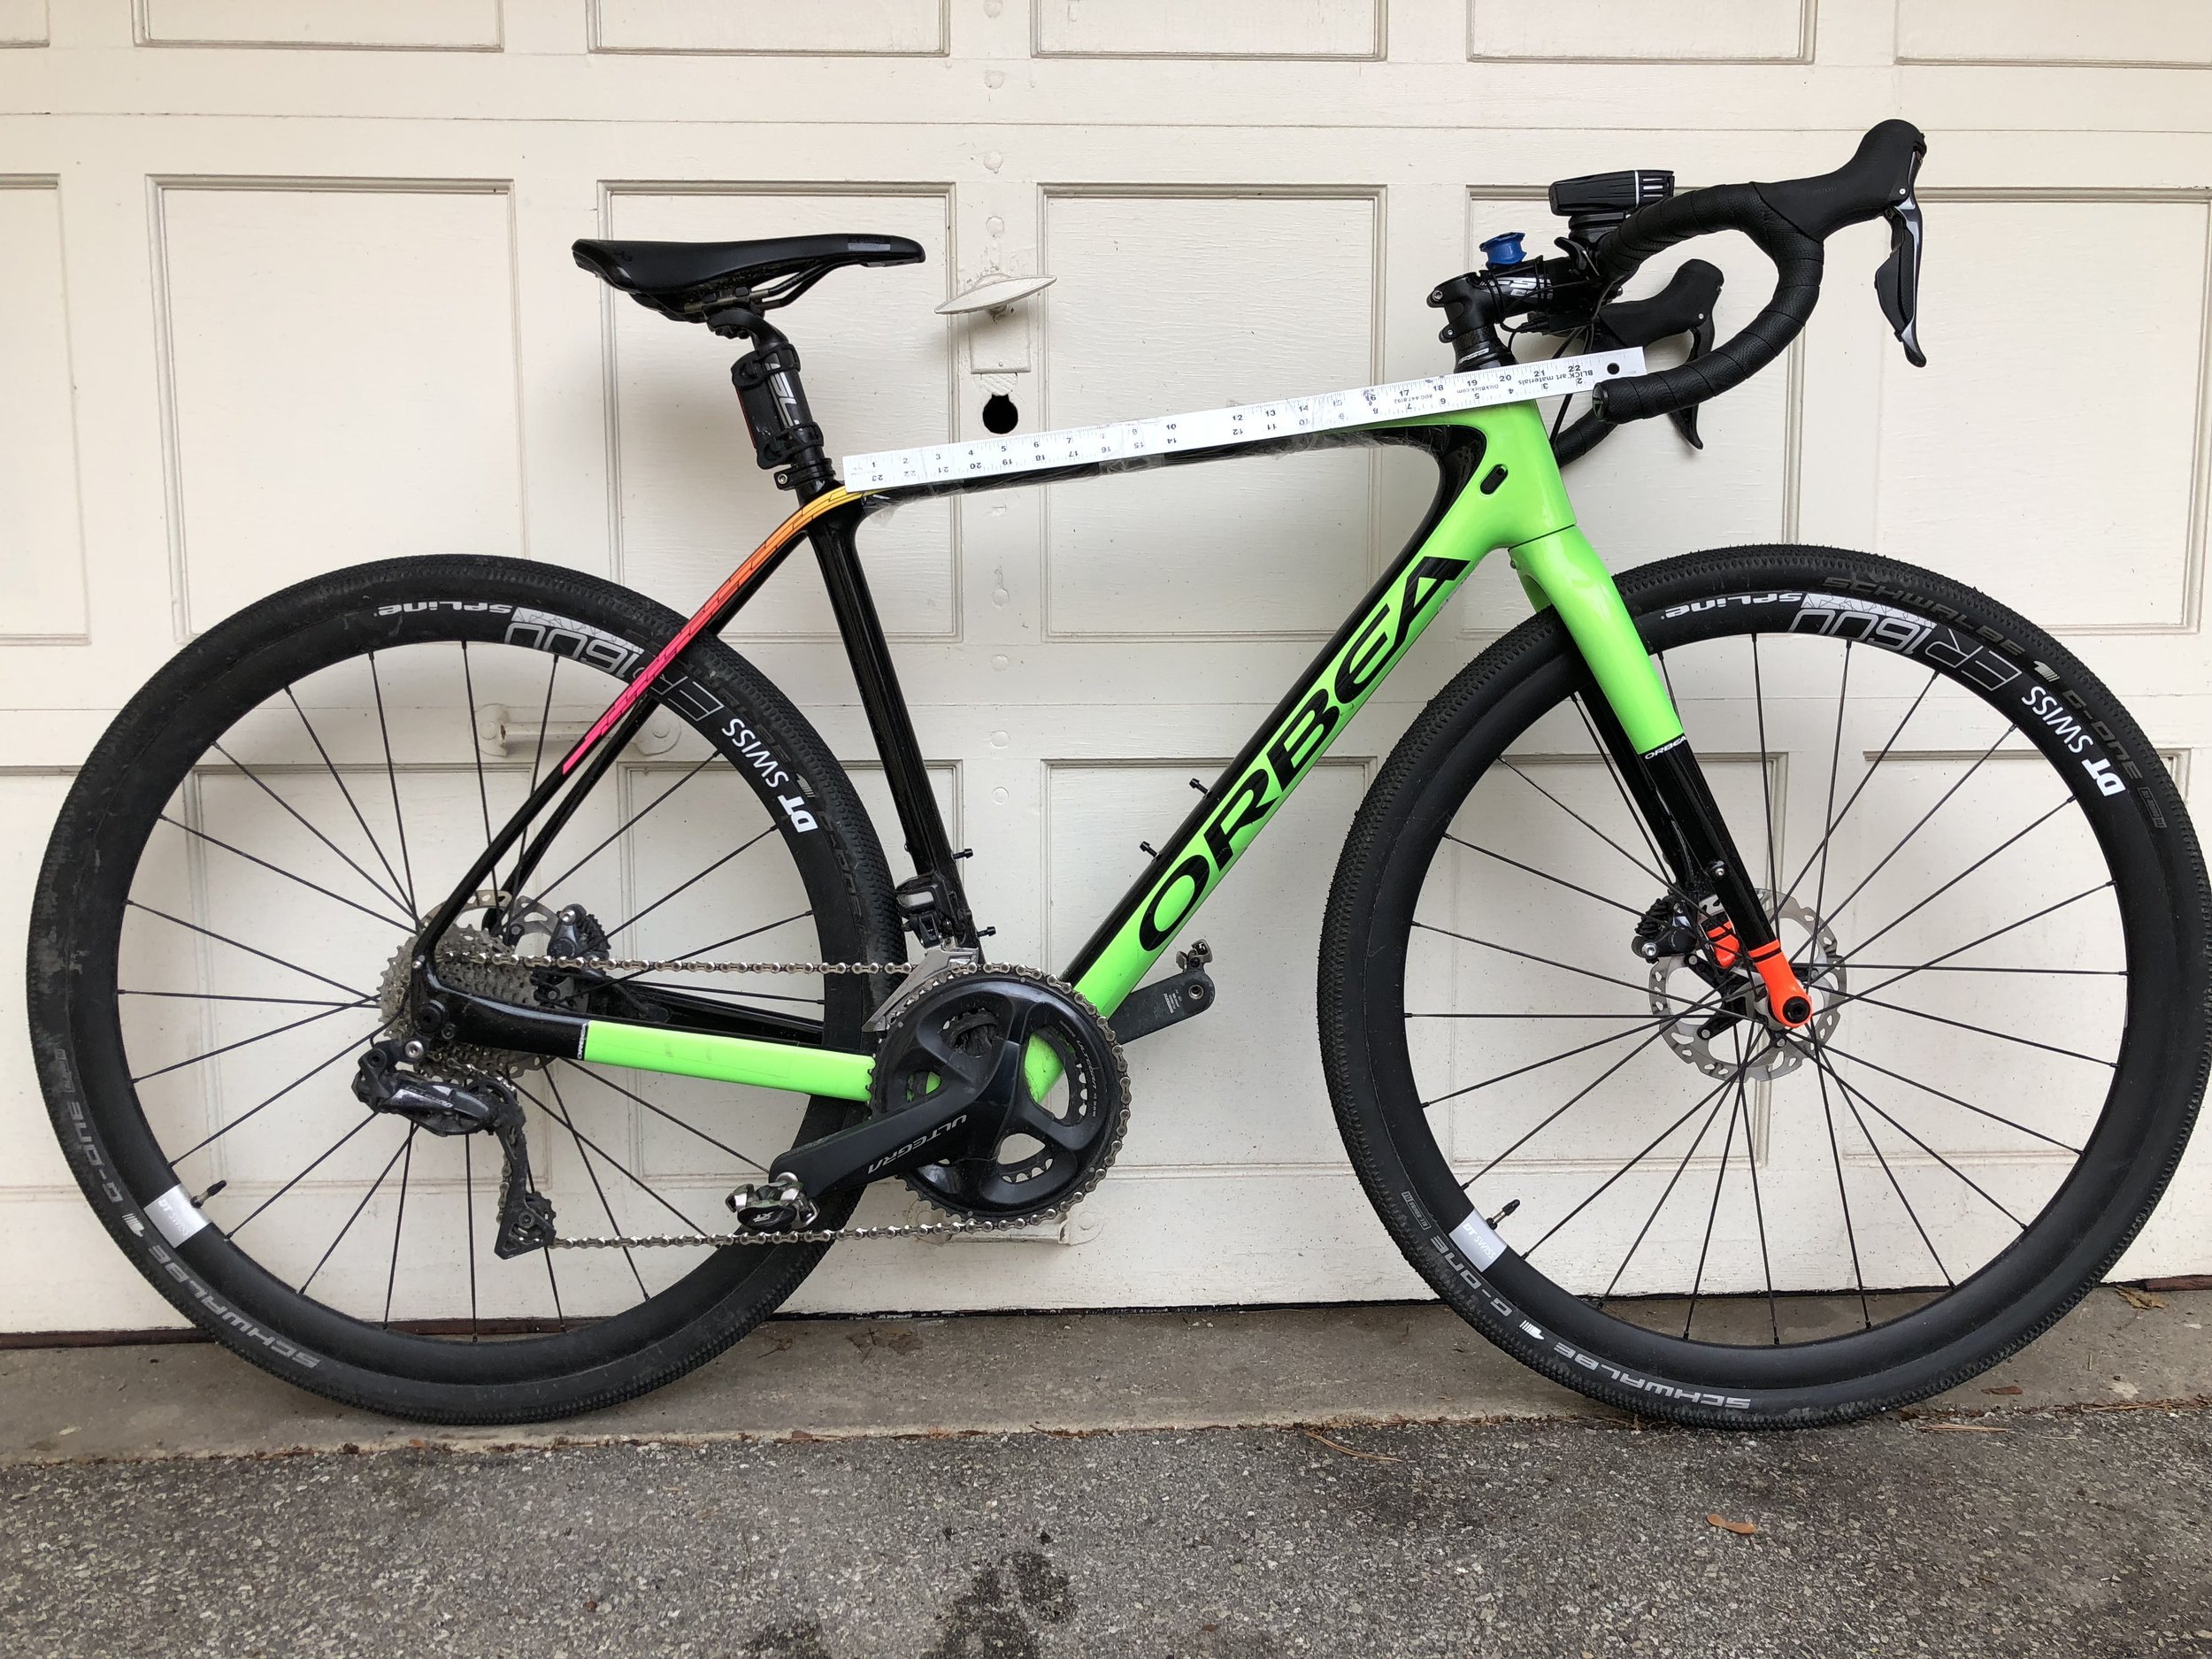
Grab your bike and a tape measure. Use a measure at least 18” long.
Affix the tape measure to the bicycle’s top tube, on the right side. Make sure the measure is legible and doesn't obscure any inside edges of the frame triangle. Also prevent the measure from obscuring bolts or fittings that straps should avoid on the outside of the triangle.
If we're building a full-triangle bag that uses straps for attachment, you can leave bottle cages installed.
If we’re building a frame bag with the partial bolt-on option, remove any bottle cages or anything else inside the triangle. Reinstall the bolts partway after removing the cages, so we can locate them properly.
If we're building a partial-triangle bag, leave your cages installed, with bottles in them.
If you're going to be using other bags with your frame bag, install these on your bike so we can see where the straps lie. (We always leave room for our in-house tank bag straps.) IMPORTANT: If your tank bag is bolt-on instead of strapped, remove the tank bag so we can see where those mounting bolts are, and avoid them!

STEP 2 of 3: TAKE TWO PHOTOS
THE BETTER YOUR PHOTOS, THE BETTER YOUR FRAME BAG WILL FIT. Observe the excellent examples above.
Place your bike, right side facing out, against a light-colored wall or background, in a well-lit area. Make sure the bike is vertical. Make sure the crankarms don't obscure any of the triangle.
Make sure your camera (or phone) is configured to shoot a photo at least 3600 pixels wide. Shoot in landscape orientation (photo is wider than tall).
Do not shoot using a wide-angle lens or setting. If the wheels aren’t round in the finished photo, the frame isn’t the correct shape either.
IMPORTANT! Sit or crouch on the ground, about 15 feet from your bike, making sure the camera is nice and square with the frame. Zoom in if necessary, but your entire bike should be in the photo, including both wheels/tires. Orient your camera lens roughly in the center of the frame triangle. Take the photo; check to make sure it isn't blurry and the measure is legible when zoomed in.
Turn your bike around, so the left side is facing out. Move the measure to the left side of the frame, and take a second photo from the same vantage point as the first. Check for quality.
STEP 3 of 3: SEND AWAY!
Send both photos in high-resolution (at least 3600 pixels wide) JPG format to info@freewheelmission.com and include your name and order number. I will confirm if your photos are okay. Once I have acceptable photos, I’ll build a perfect-fit frame bag for your bike and send it your way!
